


Fitting the Dedion Tube
- CTRMint

- Jan 20, 2019
- 5 min read
This one is a retrospective blog, installation was completed back in Nov 2017.
Out of all the steps in the 7 build, preparing and fitting the DeDion tube was the one I feared the most, simply because of the need to bend brake pipes fitted to the tube. My research before ordering the kit which consisted of watching Youtube videos from other self builds and reading similar blogs had thrown up the step and for some reason, it filled me with dread. I've no prior experience of bending brake pipes and so understanding how far is too much or how much force is too much would need to be understood along the way. Oh joy!
As it happens I shouldn't have worried, fitting the tube, it's parts, including fitting and bending brake pipes seemed to go without any issues. Now I am writing this having not tested the brakes so I'm assuming all is good, only time will tell, but I'm fairly confident in my work on this.
The DeDion tube is a large tube which sits across the rear of the car onto which the suspension components, Ears and brakes are attached. Once the tube is installed you get a good understanding of how everything at the rear of the car fits together.
I wouldn't attempt to fit the tube before fitting the differential, it might be possible to fit the differential afterwards but it will make that task infinitely more difficult.
It's probably worthwhile to quickly summarize the process involved when preparing and installing the DeDion tube into the car.
Mount/attach the Ears to the DeDion tube
Mount/attach the rear brake calliper assemblies to the Ears attached to the DeDion tube.
Construct the copper brake pipe as per the diagram using the required union.
Mount/attach the brake pipe to the DeDion tube using P-clips and rivets.
Bend the brake pipes to ensure the male connectors join appropriately with each female socket present on the callipers, don't secure.
Remove the Ears and brake callipers from the DeDion tube.
Install the DeDion tube through the car.
The reason the Ears and calliper need to be removed in step 6. is to permit the tube to be slid from one side of the car to the other passed the rear differential. If the Ears are present there simply isn't clearance.
Before cracking on with step 1. I needed to solve the small issue of handling the DeDion tube while working on it. The tube isn't heavy as such but it's a reasonable size and has some awkward shapes which prevent it sitting upright on a bench. My solution was to clamp the tube in my small vice and pad the jaws with significant amounts of rubber mating so as not to damage or mark the tube. The mat when clamped also wrapped nicely around the tube helping to stead it. The tube has a V formation in the middle which offered a great location on which to grip and raise it above the vice, perfect for working on. 'Some', well loads of gaffer tape was also used to help secure the DeDion tube.

Once the tube was secured it was a case of attaching the Ears and callipers using the appropriate fixings as per the assembly guide, given this was only temporary a finger tight approach was sufficient. I needed the assistance of my wife at this point as the weight of an Ear and calliper set on one side was too much for the centre point to hold without tipping. My wife therefore held the tube level whilst I counterbalanced the structure with the installation of the Ears and calliper on the other side.
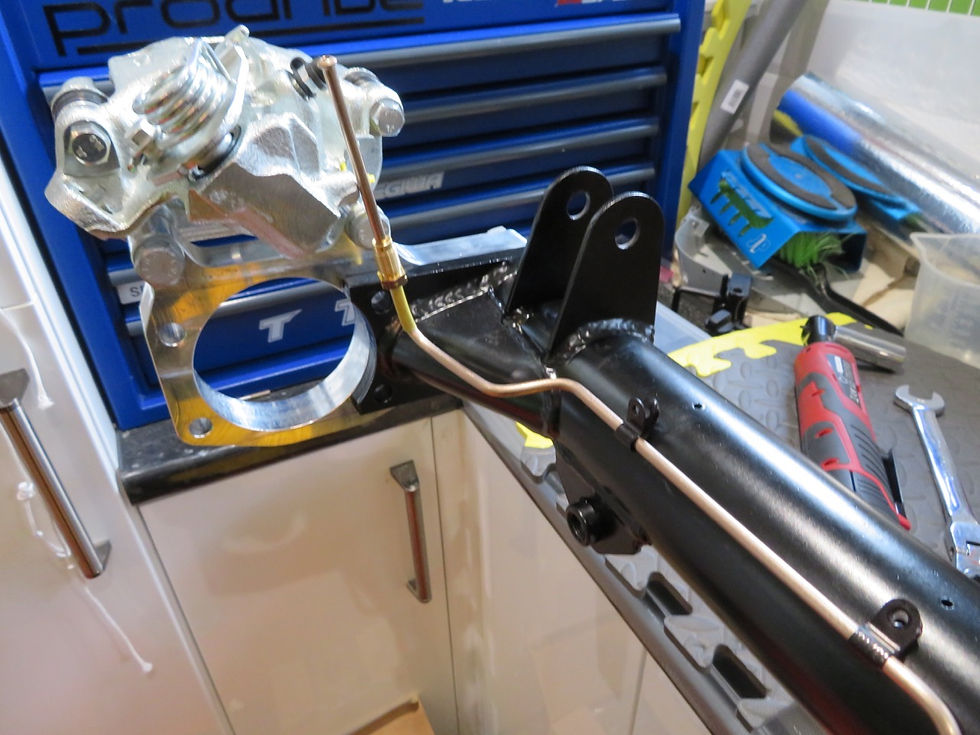
Next the copper brake pipe, we're getting to the fun bit now. The copper brake pipe is supplied in two sections. A longer section which if I recall correctly goes on the near side, and a shorter section which attaches on the offside. The two sections are preshaped to a required path when attached to the DeDion tube, although you still need to be careful to ensure the P-Clips used shortly are in the correct place. The two sections are joined together using a T shaped union which attaches onto a bracket on the forward face of the DeDion tube, as shown.

I nervously screwed the two sides into the union and attached it to the DeDion tube. So far so good!
Now to secure the brake pipe. The brake pipe is secured using small P-Clips which are riveted to DeDion tube. Thankfully Caterham predrills rivet holes on the tube and explicitly states to only use those holes.
Right time to rivet, this was actually my first time riveting anything, and it would be the first time I'd used my new air tool bought for the build!

After lots of faffing reading the instructions I finally connected the tool to the airline and fired my first rivet in. It was as easy and as quick as stapling paper, no fuss, with a satisfy hiss of air each rivet seamless attached itself and the P-clip to the DeDion tube. Sorted!

As you can see in the above image of the unconnected P-Clip and rivet holes, the end of the brake pipe is straight; however, the connection on the rear of the calliper is some distance away. This is where the pipe bending comes in. Not only that, you need to keep the brake pipe close to the tube to ensure it does not foul against suspension components when fitted. I'd considered buying a pipe bending tool but ultimately decided against it, figuring I'd go with my hands and a closer connection with what I was doing.
It's not particularly easy to describe how I initially approached bending the pipe, I had an idea of how I wanted it to look but struggled to have the confidence to bend the pipe, sorting a smooth consistent radius was my biggest concern. As I worked away it occurred to me to use the side of various sized sockets to achieve the sort of radius I required and that is actually what I did. Using various sized sockets as radius guides made the whole process straightforward and before I knew it I was sorted on both sides! Happy days.
Apologises, I didn't get any photo of me using said sockets but I'm sure you get the idea, the photos below shows the progression in the bend and the final result.


Once complete I removed the Ears and callipers being careful to avoid damage to the copper pipes and fittings, then removed the DeDion bar from the vice ready for installation.
As I mentioned above the space between the differential and fuel tank is so tight the Ears and callipers need to be removed, space is also so tight that union on the front face limits which way you can install the tube. The tube needs to be installed from the offside through to the near side, I'm sure this contradicts the manual, but I'm convinced this statement is accurate. Once through I rested the tube on the chassis (protect with insulating foam) ready for the next stage.
Check back soon, to discover the next stage, reattaching the Ears, callipers, ARB and more.


Comments