


Crutch Strap Install
- CTRMint

- Dec 2, 2020
- 4 min read
Some weeks back I decided to convert the 4 point harness in the Seven 420R to a 5 point harness. I've always felt the 4 point configuration had a tendency to ride up the stomach when the shoulder straps were fully tightened. Adding an extra fixing underneath the buckle would add additional tension from below, and therefore hold the buckle in the correct position. Caterham Cars sell a simple crutch strap conversion kit, and so I decided to purchase and proceed with the install.
The install wasn't quite as simple as expected, but after a number of sessions, I've finally got there. The end result is undoubtedly worth the effort, the harness feels really tight now and holds the buckle in the correct position.
Through the rest of the blog post, I'll recap the install and the challenges I faced, detailing what I believe was the cause of the core issue. Before we get started I'd like to shout out to the BlatChat [TechChat] regulars that provided helpful advice along the way!
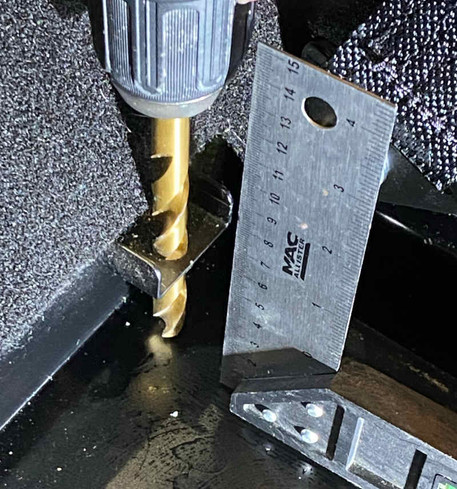
The install for the crutch strap is actually really easy. In short, the crutch strap is held in place by two existing chassis fixings behind the seat and two complementing holes in the floor which need to be drilled. Drilling the additional holes down through the chassis fixings is straightforward. I am however glad I was overly fussy about alignment as there isn't much wiggle room once the bushings from the fixing kit are added.


Once the floor is drilled you are basically ready to install the strap with the fixings. The new Duratec manual provides an illustration of the hardware and how to install.

Note the inclusion of 30P065A, the bushing is required if you have lowered floors.
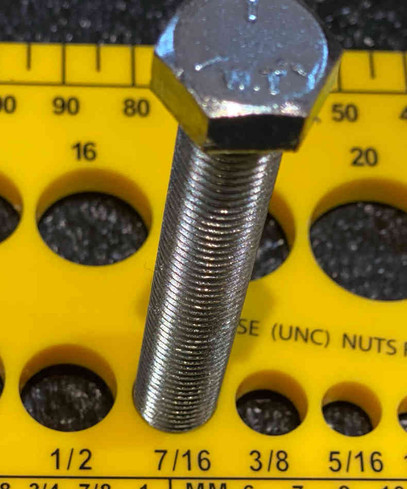
The supplied hardware within my kit didn't entirely match the documentation.

I used the following configuration during my install which seems pretty logical to me. The thin wavy washer is used as a shim between the harness retainer and the bushing to stop the harness rattling.

The following image shows the completed installed. Or does it?

Not exactly. There are two important issues in the image. Before we discuss the issues it is important to note, the Seven 420R is fitted with the Tillet carbon B6 seats as used in the 620R. If you don't have these seats then your experience from this point is likely to be different.
Issue 1, is a simple mistake, after setting the length of the strap the adjustment buckles are positioned halfway down each strap. This places the buckles underneath the convex part of the seat, or causes the buckles to be trapped behind the convex part of the seat. Not only does this shortened the harness length it's probably dangerous. The solution is to move the buckles towards the retaining fixings and set the correct length. It took me a couple of embarrassing attempts at fitting the seat to spot this. Oops.
Issue 2, is not so simple. After refitting the Tillet carbon seat with the seat runner, I found the seat could not travel to its normal position. The seat and rail were forward towards the dash by about 4cm.
Through investigation with an endoscope I found that the rear of the runner was hitting the triangular fixing from the crutch strap. The interference was preventing the seat from travelling all the way back. I personally found it made the cabin overly cramped, so the situation needed to be resolved.

Through discussions with BlatChat regulars, I became aware that the 620R seat uses a different (bespoke) seat rail. When mounted with the seat the 620R seat rail protrudes further back and hence the interference. This situation doesn't seem to occur with the standard 420 GRP bucket seat which uses a different (standard) rail.
It's taken a number of weeks to find a solution, I've tried various options. In the end I went with one of my first ideas, reverse the seat rails. From visual inspection it was clear the seats were mounted on the rails towards the middle of the rail. Or rather the holes used within the rail weren't the most rearward, they were in fact one forward from the rear. This created a greater rearward overhang from the rail when the seat was moved backwards.
Reversing the nearside or inboard sliding rail was easy. Once reversed, the back mounting could be passed through the first bolt hole in the rail. This resulted in the seat being positioned further back. Great!
Performing the same trick on the adjustable rail with the handle wasn't going to work. Clearly it can't be reversed in the same manner as the handle has to remain in the same orientation. I could move the rear fixing to the first or outer bolt hole, this aligned the rail with the now reversed inboard rail and moved the seat further back. Unfortunately the front mounting did not align with a corresponding bolt hole. The bolt hole available was misaligned by about 3mm. In the end I elongated the bolt hole with a Dremel until I'd removed just enough material to insert the bolt straight. I then used a large washer to strengthen the aperture. Luckily the two sliders within the rail have sufficient clearance to support a large washer. I don't believe the solution introduces any safety concerns. 3 of the fixings remain untouched, the 4th outer rail front is only a minor change supported by a substantial washer. In the event of an impact I suspect the harness will retain the occupant firmly in the seat preventing any seat movement and stress to the modified bolt hole.

With both rails adjusted and the seat positioned further back on the rail, I've gained sufficient travel in the rail without causing interference against the strap mounting. Sadly I totally forgot to take photos of the final solution.
At some point I'm likely to repeat the install on the 620R and so will attempt better photographic documentation during that process.
Thanks for reading.


Comments