Fitting the Aeroscreen
- CTRMint
- Aug 24, 2019
- 7 min read
Updated: Aug 26, 2019
Last weekend, scratch that this blog is rather overdue, the weekend of the 10th of August was a truly miserable weekend weather-wise, much of the British Isles suffered high winds and heavy rain. The Isle of Man had escaped much of the bad weather which circulated prior, but even it wasn't going to avoid the downpour. Such weather isn't 'Sevening' weather, even if you are crazy enough to enjoy open-air motoring in the rain I just don't think it's much fun on the Avon ZZS tyre. As I wasn't prepared to drive the 7 and concerned the change in weather signified the end of summer I decided to finally sort fitting the Aeroscreen. I'd committed myself to evaluating the Aeroscreen before the end of summer, but with the failed radiator and idle problem, the test had been delayed. It was time to get to it! This blog aims to document my experience fitting the screen.
Before we begin, I must clarify my car was supplied with both full weather gear and the Aeroscreen from the original factory order. Why is this important? At the factory, Caterham Cars fit a threaded support bracket behind the skin of the car around the knee trim area. It is this bracket which receives the Aeroscreen retaining hardware. If you purchase an Aeroscreen as an aftermarket option from Caterham or other manufacturers you'll need to fit the bracket. Given my Aeroscreen came with the original order, I didn't need to worry about the bracket. Details pertaining to the fitment of the bracket are therefore omitted from the blog. Additionally Caterham Cars don't publish any installation instructions for the Aeroscreen!
As Caterham Cars don't provide any documentation, I hope to bridge such a gap with a well structured and informative post. To that end, let's start with a quick list of the steps needed, we'll then delving into each step separately.
Windscreen wipers removal.
Windscreen removal.
Test fit the Aeroscreen.
Attach the rear view mirror base to the Aeroscreen.
Mount Aeroscreen onto the car body.
Align and drill mounting holes for wing mirrors.
Finishing touches, that other bolt hole.
Step 1, Remove windscreen wipers
In terms of complexity this step is very straightforward, if a little tricky. To remove each wiper arm and blade you need to lift the small retaining spring. Once lifted the arm will pull away from the wipe mechanism. I suspect you could depress the spring with a small screwdriver, however I opted for a plastic tool from a trim removal kit. The plastics in such kits tend to be less damaging against metal and paint should you slip.

Step 2, Windscreen removal
The removal of the windscreen was the step I was most concerned about. Little guidance was available online and with the potential for cracked glass and paint damage, I was very cautious. Given my apprehension, I conscripted the assistance of my wife and a friend to help.
Before starting the task, I was unsure whether to remove the windscreen from the stations via the 3 retaining screws located on either side. Or should I leave the stations in place and remove the windscreen and stations together, using the two lower bolts located either side. In the end, I went with removing the entire assembly in one piece, leaving the stations attached to the screen. Having completed the task I'm now confident this is the correct approach.
Before removing the screen you will need to disconnect the heated screen connections. The heated screen has two connections, one located either side. In my kit the cable ends were supplied undress, i.e. just bare wires requiring fitment of a spade end connector. During the build I'd located the passenger side cable and fitted a spade connector, but I'd always struggled to locate the driver's side, and so it wasn't dressed. Unfortunately the spade connectors will not pass through the hole in the body and so they need to be removed. As I'd soldered and applied heat shrink to the passenger side spade connector it had to be cut free.
Having undressed the heated screen connections it's time to carefully remove the 4 lower retaining bolts. These are removed with the appropriate hex key. The windscreen then lifts away from the body. There is a rubber seal between the windscreen screen and body, which I found reluctant to release around the fixing bolts. This is where the extra assistance will come in as you'll need two bodies to support the screen while you ensure the rubber seal releases without damage. Once you are confident the seal has released, gradually lift and move the windscreen towards the front of the car. Have one person either side carefully supporting the screen. You'll need a third person to pull the heated screen cable through. Once free carefully store the screen. You'll need the fixing hardware for the fitment of the Aeroscreen.
Step 3, Test fit the Aeroscreen.
Before proceeding I performed a quick test fit of the Aeroscreen on the 7. This entailed gently laying the screen onto the car and checking all the fixings were aligned. It was at this point I spotted the following quality issue.

The poppers which Caterham Cars fitted to the car body and to the Aeroscreen were heavily offset towards the driver's side. Some may consider this a non-issue, it doesn't impact function and so forth. Personally, I'm of the opinion it is consistent with the lack of basic quality control present in the product. That might sound harsh, but it's not the first time I've found this sort of issue. It basically equates to someone couldn't be bothered to measure, and just drilled. For a car which cost over 40,000 GBP it stinks! I'd also offer there's a multitude of simple solutions to ensure quick reproducible results when it comes to drilling such things, so no excuses on this one.
I personally believe if you take care of the finer details, the bigger picture takes care of itself.
During the build process I'd typically attempt to correct similar challenges. Sadly I can't do that here since the receiving popper base is in the car body, I'd thus need to drill additional holes into the body. Clearly that's not a sensible thing to do, so on with the installation.
4, Attach the rear view mirror base to the Aeroscreen.
With the support of your helper, this step is pretty quick.
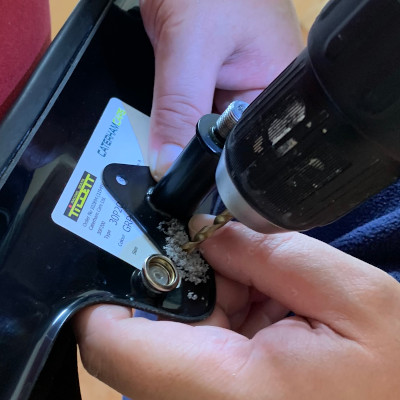
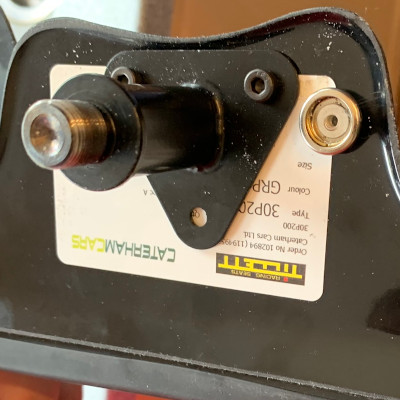
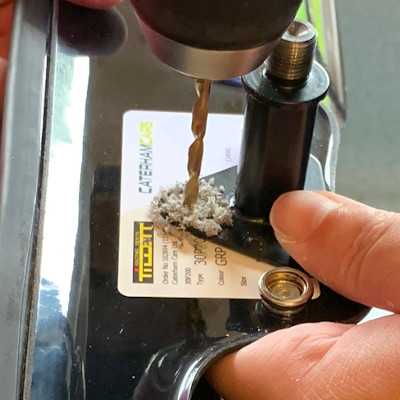
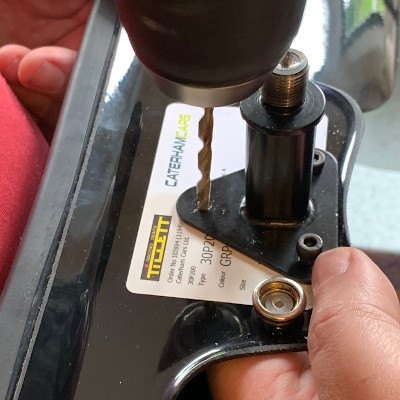
Separate the rear view mirror from its base. Seat the triangle section of the base against the reverse side of the Aeroscreen between the popper bases. Ensure the side with the two bolt holes is outermost and against the lip present in the moulding. Hold the base straight against the moulding and ensure it's equidistant between the poppers. Be mindful of the poppers on the upper face, those bases are slightly larger. Have your helper hold the base and Aeroscreen, then drill the first hole. Secure the base with the first nut and bolt, then repeat for the remaining two holes.
Once all holes are drilled refit the base to the top side of the Aeroscreen, fitting nuts to the upper side. Torque the fixings appropriately but be mindful not to crack the G.R.P. or carbon fiber.
5, Mount Aeroscreen onto the car body.
Having installed the rear view mirror base onto the upper side of the Aeroscreen, it's now time to install the Aeroscreen onto the body.
Carefully place the Aeroscreen over the body, and press the poppers together. Gradually rotate each end of the Aeroscreen until it aligns with the forward most windscreen bolt holes. Insert a bolt previously used to retain the windscreen and a finishing washer from your kit.
Torque with a 5 mm hex key. No torque specification is available, it needs to be sufficiently tight so it won't loosen, but be mindful not to deform the body.
I also applied P.P.F. to rear ends of the screen where it makes contact with the body and fixings. I'm not sure if this is needed, but I had the material spare and thought it would reduce any potential paint marring.
6, Align and drill mounting holes for wing mirrors.
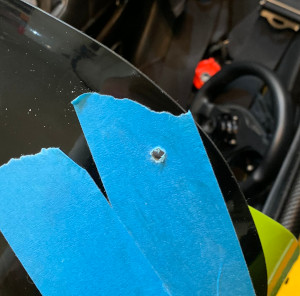
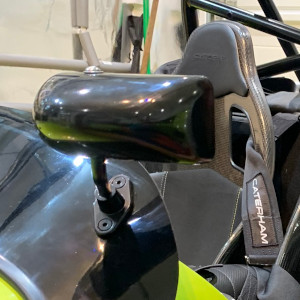
The next step is to fit the side mirrors onto the Aeroscreen. Now you are probably well advised to consult other blogs for this task. I'm not saying my workmanship was a disaster, but in the end, I estimated their position going with how things looked visually. The result worked out very well, but it's difficult to provide any precision in the description I'm detailing in the blog. The difficulties arise from the fact there's little in the way of reference points on the Aeroscreen, especially in G.R.P. I believe some builders such as Daniel French used the carbon fibre weave across his screen. The second challenge is due to the mirror base being flat, and the Aeroscreen being curved, mating those will always be tricky. After much trial and error trying to identify an optimal location I went with a position as high and as far out as possible. I was mindful not to get too close to the edge of the screen, I didn't want it cracking once drilled. Also if you position the mirror too far out, the Aeroscreen becomes more curved, and of course, starts to drop down. As part of my evaluation process I placed detailing tape onto the screen and slid the mount around until I found the right location, where the base made the most contact with Aeroscreen. The tape ensured no scratches were induced whilst moving the base around.
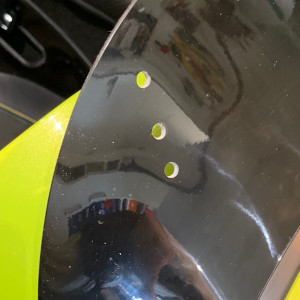
Once you've found your location it's merely a case of holding the base in place and drilling the required holes, then inserting bolts and Nylocs to secure.
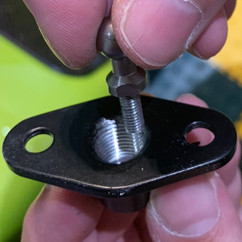
I opted to drill a third larger middle hole to provide access to the large grub screw at the rear of the mount which binds the mirror arm. Doing so provides better adjustment and control over mirror positioning. If you opt to do this you'll need to disassemble the mirror mount by removing the grub screw and dropping the ball joint out. Once removed drill top-down through the center of the mount as a guide.
Once you've secured the each mirror base onto the screen, it's a case of attaching each mirror via their respective threaded sections. Easy!

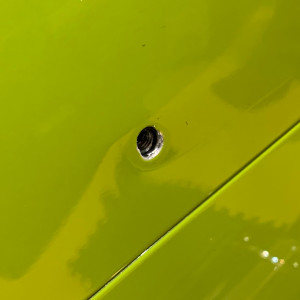
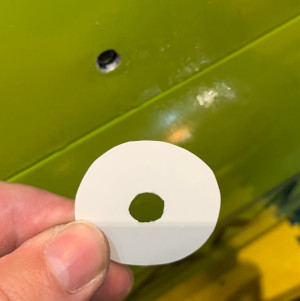
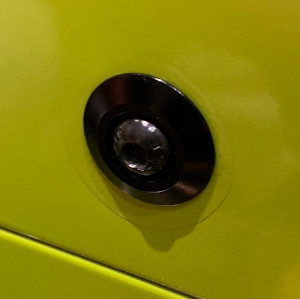
7, Finishing touches, that other bolt hole.
You may recall the original windscreen had two fixings on either side, however the Aeroscreen used only one fixing each side. The remaining threaded fixing holes needed to be addressed. As there are no instructions for the kit it's not clear what Caterham expect you to do. I had a couple of the finishing washers left so using the original bolts decided to dress the holes with those. To ensure the contact side of the washer didn't scratch the paint I prepared circular pieces of P.P.F. and applied where contact was made. The final result looked pretty good.
That pretty much covers it and I hope the post was helpful.


