


Driveshafts, and DeDion ears
- CTRMint

- Jan 23, 2019
- 3 min read
This one is a retrospective blog, the installation was completed back in Nov 2017.
Following the successful installation of the DeDion tube, A-frame and ARB it was time to install the driveshafts and ears. Again this part of the build was fairly straightforward without any real concerns, plus the assembly guide covers this topic with sufficient clarity. Given this, you are unlikely to find any new critical information here, but hopefully, some of the images might help as you prepare.
The driveshafts for the 420R are handed, and sorry I don't recall which is which, however, I don't recall any issues working it out either, so I'm sure you'll be fine. They were clearly labelled, so it might have been a case of checking the part number on Caterham's parts website. I do remember my driveshaft nuts were supplied separately from the driveshafts themselves. The Ikea manual implies they are pre-installed and need to be removed, but not thrown away. This may be a Sigma vs Duratec thing, just be mindful of where your driveshaft nuts are before you begin. The driveshaft nuts are also handed as stated in the assembly guide so you need to also take care of this.

Installation was simple, remove each of the Red plastic inserts from the differential and insert the appropriate driveshaft, obviously with the hub/nut side on the outward side of the car. With a firm press, I found the shafts sat home. Without the ears to hold the shaft in place I found they wanted to drop and I wasn't too keen on placing undue stress on the joints, so I tie wrapped the ends to the radius arm for support. It is important to ensure the handbrake cable which was fitted prior runs around the back of the shaft as shown in the images. You don't need to fit the drive shaft nut at this point.


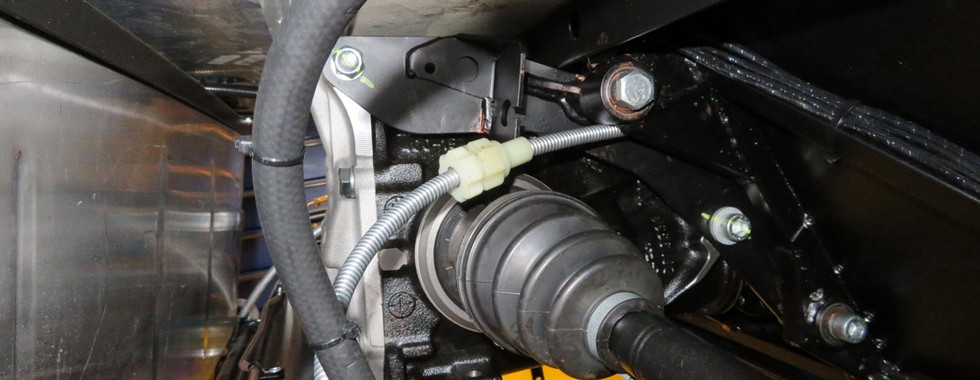


As mentioned the shafts are supported by the "ears" which are attached to the DeDion tube/bar. An ear as it is termed is a machined billet aluminium bracket used to hold the rear brake calliper, rear hub and driveshaft to the DeDion bar.
Mounting the ear is a simple process of attaching four bolts through each ear onto the DeDion tube. Two of the forward bolts however also pass through the rear hub assembly. In the 2015 assembly guide, it also suggests using silicon sealant between the ear and the DeDedion tube, I suspect to minimize the chance of water ingress and subsequent corrosion of the tube. I followed the recommendation and lightly covered the edges with some exterior sealant and then clamped each ear in place using 4 bolts, but without the rear hubs. Doing so ensured an even clamping load was exerted on the silicon joint whilst setting, once set the forward rear hub bolts were carefully removed.

I think it's pretty obvious what happens to the driveshaft, as shown in the images, it must pass through the circular aperture in the ear. You may also note from the photos I installed the rear brake calliper assembly to the top mounting points on the ears. Whilst this is the correct location, having the sliders installed was later found to be a problem. I'll cover that topic in a later post.


Before discussing the rear brakes, I need to cover the rear hub assembly. Unfortunately, I encountered a bit of an issue which I will detail in the next blog.


Comments