


Replacing the failed radiator (warranty)
- CTRMint

- Jul 25, 2019
- 9 min read
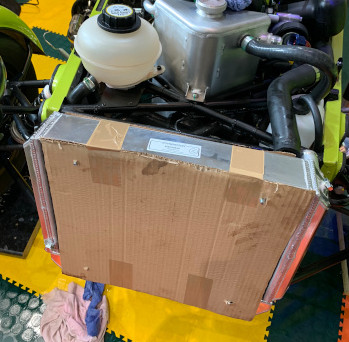
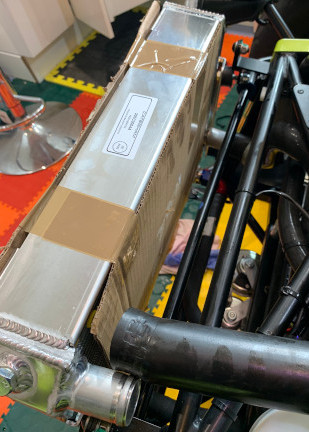
My new replacement radiator arrived on Tuesday having been hand-delivered by my in-laws which I greatly appreciate. Given my in-laws are also returning the failed radiator to Oakmere I needed to undertake the replacement quickly, Wednesday was therefore allocated to the task.
It wasn't clear from the outset whether the replacement part would include the oil cooler assembly which is bolted underneath the 420 S3 radiator. Confirming this was therefore the first step in the process, and upon opening the packaging I can state the oil cooler was included. Swapping the radiator over was going to require careful handling of the oil lines, a potentially messy job.
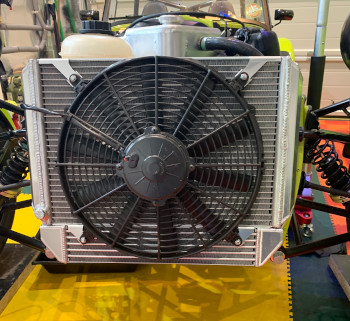
I was in two minds whether to leave the fan on the radiator during the removal phase, I suppose there are pros and cons. In the end I opted to remove it. The electrical connector was disconnected from the loom and the four retaining 10 mm nyloc nuts removed. I was concerned the fan might drop off the car with the nuts removed but there is sufficient support from the integrated bolts to hold the fan in place without it dropping off, so there was no need to rush or try and simulate 3 hands.


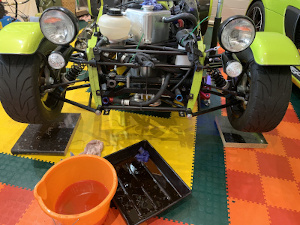
Once the fan was removed, the next logical step was to drain as much coolant from the radiator and around the front of the car. I wasn't aiming to remove all the coolant, just that which needed to come out. Through the use of a trolley jack I'd raised the front of the car slightly in a hope of reducing the amount of oil which would escape from the oil lines, and also to get a bucket under the radiator to catch the coolant. With a bit of luck the increased height at the front would also reduce the amount of lost coolant. I placed a bucket under the offside corner of the radiator, below the drain plug, being careful to note the expected flow and arc likely to occur. I also located a small funnel around the gap between the oil cooler and radiator, this was designed to reduce the amount of coolant which would inevitably escape backwards. With a 17 mm socket I removed the drain plug, initially about halfway, no coolant escaped, then all the way removing the plug/bolt and washer. Still no coolant leaked out.


Before I continue, I'd just like to reiterate the general gist or approach of my blog. I'm not a seasoned mechanic, amateur or otherwise, and I'm trying to approach my blog for a similar audience. The blog is designed to be informative for all, but in some cases, I'll describe topics which are probably blatantly obvious to the more experienced hobbyist. If you're a more experienced reader, please bear with me.
Back to the shy coolant. Having no coolant drain from the radiator with the drain plug out is a behaviour I've seen previously and is perfectly normal. Removal of the expansion tank cap is required, the coolant will then exit out of the drain hole at full flow. I suspect this behaviour is due to a pressure differential between atmospheric pressure and that inside the expansion tank and coolant system. Clearly the pressure in the system must be lower than atmospheric pressure otherwise coolant would be immediately forced out. I am unsure whether there is a negative pressure or simply a vacuum. I suspect a vacuum is created when the system is bled, I can't see how a negative pressure would be created. Although what would happen if you removed the expansion cap when cold? Surely that would negate the vacuum? Hmmm. Fascinating stuff! apologizes for the tangent, I find this sort of thing curiously interesting. With the coolant free, I also released the bleed nut too, the coolant was left to drain into the bucket, I believe around 4.25 liters landed in the bucket and thankfully only a handful on the floor.
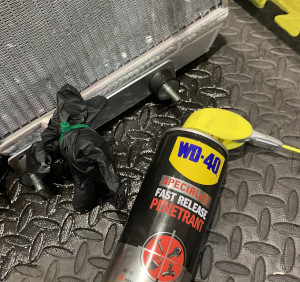
With the coolant mostly drained I slackened the jubilee clips holding both coolant hoses and then disconnected them from the radiator. Each hose was then covered with a fresh rubber glove and cable tied in placed, this was designed to reduce coolant spillage which might end up in the oil lines.

My plan for the oil lines and remaining part of the radiator removal was to back off the oil lines from the oil cooler to about the final last two threads, then remove the radiator retaining nuts, leave the radiator hanging and quickly finish removing the lines, lastly lift out the radiator. This approach worked exactly as planned and produced surprisingly little oil loss. I used a 32 mm spanner to release each oil line to the point I could unscrew each with my fingers and as mentioned to about the last two threads. Each retaining nut and split washer was then removed from each of the four mounting bobbins. Even with the retaining nuts removed the radiator seemed fairly stable, I suspect due to the threaded stud on each bobbin being forced into each bracket by the weight of the radiator.

Removing the final threads from the cooler lines was now easy, after which the radiator simply pulled away from its mounts. So far so good!


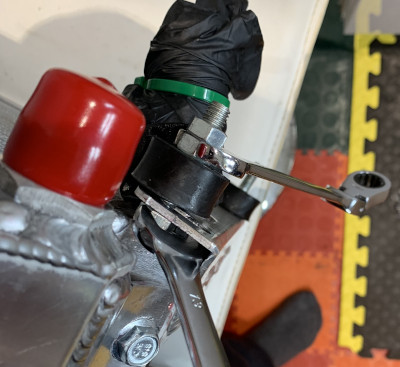
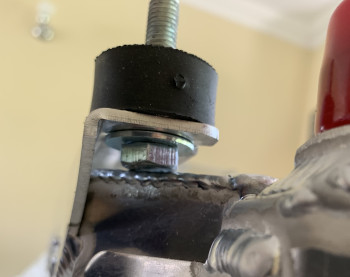
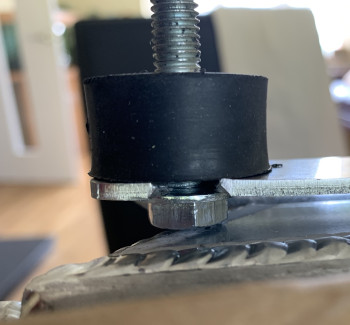
As mentioned the radiator is mounted to the chassis brackets using bobbins, specifically a male/female type bobbin. The female side is threaded onto a bolt located on the radiator while the male side, a threaded stud is inserted through the chassis bracket and secured with a nut and washer. Each of the existing four mounting bobbins needed to be transferred from the old radiator, however removing them proved difficult. Getting a 13 mm spanner onto the various bolt heads is always difficult due to the clearance between the end tank and bracket. I did manage, but then found I couldn't grip the rubber bobbin with sufficient force to release bobbin. The next step was to place two 13 mm nuts onto the male side, I could then use a spanner on the first of the two nuts. The theory of this works, but I still struggled. I did manage to release two of the bobbins, but gave up on the final two.


I'm surprised about the level of resistance present within the threads, I'm sure it can't be corrosion, had I mistakenly thread locked them during the original build? Luckily I had a couple of spare bobbins so replaced those I didn't remove from the faulty radiator. I also used my tap and die set to clean the threads on those being reused. I was now ready to start looking at the new radiator.
Step in the second challenge. As mentioned above the female side of each bobbin is secured onto existing bolts present on the radiator. Two of those bolts, the two lower ones need to be installed. Now all four need to be cut to length which I'll discuss shortly. The bottom two bolts should be cut before inserting through the bracket otherwise it's not possible to fit them. Each cut bolt is inserted from behind the bracket, via the edge of the end tank so that the bolt head sits behind the bracket. It is a tight fit and requires careful positioning of the bolt head. I removed the lower bolts from my existing radiator to avoid having to cut a new set. I managed to fit one of the lower bolts, however it was simply impossible to fit the second. There wasn't clearance between the end tank and its welds for the bolt head. Try as I may it just wouldn't fit. I'm sorry to say another quality assurance issue from Caterham Cars, they need to get a handle on this stuff.


I tried inserting a long bolt down through the bracket, placing a nut on the end and then adding a small amount of leverage on the bolt to pull the bracket out. I wasn't prepared to use much in the way of force, and that I did use didn't create sufficient clearance. I was stuck.
It was time to call Oakmere and discuss my options. I initially spoke with Paul their service manager, he chatted through the problem with me and then went away to sort a solution. I subsequently received a call back with a couple of routes forward.
Replace the radiator (again)
Extend the elongation of the bolt hole into a slot
Reshape the bolt head.
Replacing the radiator would have been a complete pain, a further delay in getting the car back on the road was one thing, but we'd be back in the hands of the couriers. No thanks.
Paul stated the guys in the workshop would simply elongate the bolt hole to the edge so that it became a slot, and then slide the bolt in. We discussed the pros and cons of this approach, and I was assured Oakmere would standby it as a solution, so no warranty issues.
Alternatively I could grind the bolt head down to make it fit. I just didn't fancy that one. I also considered thread locking a bolt into a spare bobbin, then cutting the bold head off, essentially making a Male/Female bobbin, Male/Male. I'd then use a nut behind the bracket. I gave this solution serious thought but wasn't able to get a 13 mm nyloc between the endtank and bracket.
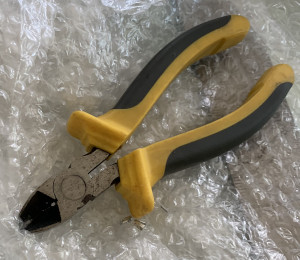
Confident Oakmere (Caterham) would warranty the modification of the bracket I went with the elongation approach. During my discussion with Paul he'd suggest a hacksaw or similar to cut away the aluminium. I wasn't comfortable with that approach as it meant sawing towards the core. Mistakes happen! I opted to use a pair of strong wire cutters or snips. Now I appreciate I've probably damaged the cutting surface of the snips, let's face it, it's not what they are designed for, however sacrificing the snips was an acceptable loss.
I carefully cut two straight lines from the edge inwards. Each line required 3 or 4 quite brutal compression on the snips, but they went through. In minutes I'd slotted the bracket. The snips didn't seem that bad either.

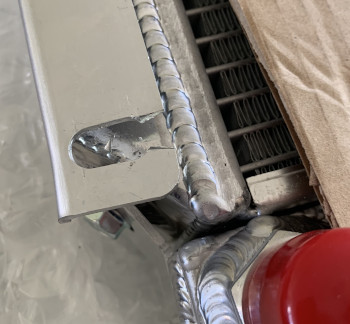

A large washer was then placed on the cut bolt, and both were slid into the slot so that they resided behind the bracket. The bolt thread was then screwed into a bobbin and the assembly lightly secured into place. Problem solved.

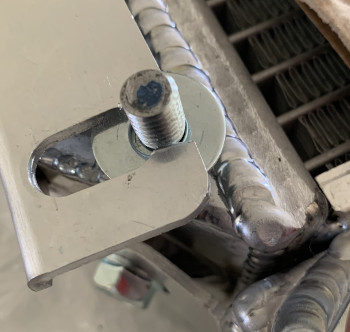


With a bobbin also placed on the other bottom bolt it was time to look at the top bolts.
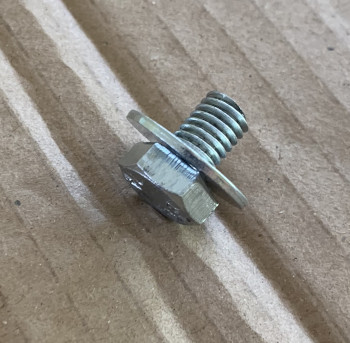
As mentioned earlier, the bolts need to be cut as they are too long for the way the radiator is mounted which translates to inserting the bolt thread into the female side of the bobbin. The thread depth of each bobbin is around 8.1 mm, using a set of digital calipers I found a nut and washer combination which gave me 8 mm. The nut and washer was then secured onto each bolt and locked tightly into place against the bracket. A hacksaw with a fresh blade was then used to cut the bolt down using the nut as a straight edge and guide. Removing the nut of course helps clean the final few threads after cutting so once removed the bobbins could be fitted immediately. With all 4 bobbins now fitted, the radiator was pretty much read for installation.

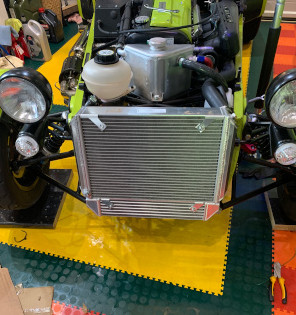
Before fitting the radiator I wiped the oil cooler lines down and smeared a small amount of oil on the threads to ensure smooth fitment. The radiator was then hung on the brackets using all four bobbins and the oil cooler lines attached. This was a little fiddly as I didn't want to damage the radiator, thankfully I hadn't removed the cardboard. The nearside line being a straight-ahead approach went on with ease, unfortunately the offside was much more difficult due to the natural twist in the oil hose. In the end I removed the line from the top of the sump tank, this made attaching the line at the bottom significantly easier. Once the oil lines were attached I secured the bobbins against the chassis brackets with their respective nuts and split washers. The top and bottom coolant hose were then attached, and jubilee clips secured in placed to lock the hoses down.
I probably spent a further 30 minutes adjusting the radiator on the horizontal plane to ensure it was centered under the nose cone. This was achieved by slackening each inner radiator bolt from the bobbin and sliding the radiator from left to right. There isn't a massive amount of movement, but I suspect it is important. I've still to fit the nose cone, fingers crossed.


With a final check on all fixings it was time for some fluid. The bleed bolt was removed and about 4 liters of fresh 50:50 mix coolant was slowly poured into the expansion tank, at which point it started to overflow out of the bleed hole. The bolts was subsequently reinstalled. I squeezed a little more coolant in after pressing on various hoses repeatedly. I topped up the coolant slightly beyond the max line expecting a drop in level as trapped air was expelled during the bleeding process. For completeness around 100 ml of oil was also added to the dry-sump tank to compensate for the oil removed within the cooler and also lost into a drain pan during removal.
Time to start and bleed the system then. As the car hadn't run for around a month and I'd interrupted the oil circuit I opted to create oil pressure first before firing the engine. The typical approach of pulling the inertia switch was used, the engine was then cranked over without firing until pressure registered on the dashboard gauge. The inertia switch was then reconnected and the engine started.
So far I've followed the fairly typical bleed process of getting the car up to temperature and expelling air via the bleed bolt. The first cycle did reduce the coolant level which I've topped up once the car was cold again. I'll perform the same steps a couple of times before refitting the nose.
I've checked the car today and there was a small spot of coolant under the offside corner, I'm hopeful it was coolant lost during the fitting of the lower hose rather than an issue with the radiator.
Hope you enjoyed this rather lengthy post, and please check back for final confirmation the radiator is good.
Reference
Previous post, relating to the discovery of the leak, https://www.caterham7diaries.com/post/radiator-gives-way-starts-to-leak


Comments